|
To add folders to the archive, open an archive and click one of the following methods:
 Allow the Setup Wizard to find photos
| 1. | Click File > Setup Wizard. |
| 2. | On Setup Wizard - Step 1, click Photo Backup will search for folders. |
| 3. | On the Search for Folders with Photos dialog box, click the check boxes next to the drives you want. The search can take a few minutes. |
| 4. | After the search completes, the Search Results dialog box presents a list of folders. Click the check boxes next to the folders you want to archive. |
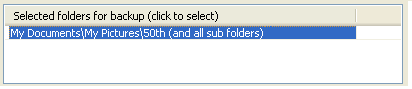
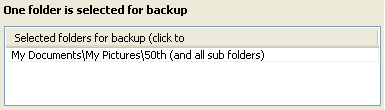
| 5. | Setup Wizard - Step 2 displays the selected folders in the Selected folders for backup list. |
 Important Important
| • | If you want to select photo folders, you can select more options on Setup Wizard - Step 2. |
How?
| 6. | Click the Finish button. The photos in the folders that you selected appear in the main window. You are now ready to start the backup process. |
How?
Select the photo folders you want with the Setup Wizard
| 1. | Click File > Setup Wizard. |
| 2. | On Setup Wizard - Step 1, click Let me choose photo folders. |
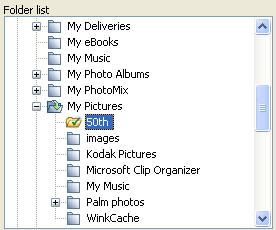
| 3. | Setup Wizard - Step 2 displays a directory tree in Folders List. Select a folder with photos in the Folders List. |

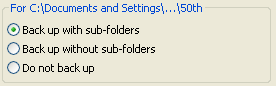
| 4. | Click Back up with sub-folders or Back up without sub-folders. |
This adds the folder to the Selected folders for backup list.
| 5. | Click the Finish button. The photos in the folders that you selected appear in the main window. You are now ready to start the backup process. |
How?
 Tip Tip
| • | To remove a folder from the Selected folders for backup list, click a row in the list and select Do not back up. |
Use the Archive Settings dialog box
| 1. | Click Tools > Archive Settings. |
| 2. | On the Select Folders for Backup tab, the Folders List displays a directory tree. Select a folder with photos in the Folders List. |
| 3. | Click Back up with sub-folders or Back up without sub-folders. |

This adds the folder to the Selected folders for backup list.

| 4. | Click the Finish button. The photos in the folders that you selected appear in the main window. You are now ready to start the backup process. |
How?
Tip
| • | To remove a folder from the Selected folders for backup list, click a row in the list and select Do not back up. |
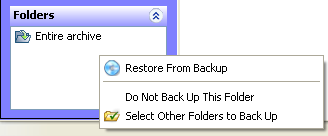
| • | You can also add photos with the shortcut menu. In the main window, point the cursor in the Folders area of the main window, right-click, and select Select Other Folders to Back Up on the shortcut menu. |
Use Windows Explorer
| 1. | Place photos in the archive directory in Windows Explorer. |
| 2. | In Photo Backup, click View > Refresh. The new photos appear in the main window. |
 Related Topics Related Topics
Setting up an archive
Customizing archive settings
Set up an archive
|