To back up your photos, you must first set up an archive and add photos to it. To set up an archive the first time you use Photo Backup, the Setup Wizard steps you through the process of setting up an archive and adding photos to it. You can also set up an archive by selecting commands on the File or Tools menus.
![]() Note
Note
| • | Setting up an archive does not change or move the photos on your hard drive. |
To do this |
Click this |
|
|
Create an archive with the Setup Wizard. |
File > Setup Wizard. The wizard can find photos for you. You can also select the photo folders that you want. |
Create an archive from scratch and add photos later. |
File > New Archive. Then, to add photos, click File > Setup Wizard or Tools > Archive Settings. |
Add photos to an existing archive. |
Open an archive and click File > Setup Wizard or Tools > Archive Settings. |
![]() Tips
Tips
| • | You can create an archive with the default settings. Or, you can customize them when you select Tools > Archive Settings. |
| • | If Photo Backup finds the same photo in different directories, the software archives only one photo. |
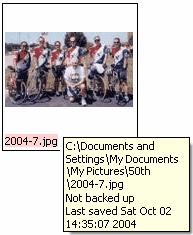
When you add photos to an archive, the photo displays a pink label in the main window and the words Not backed up in a tooltip.
You can save an archive after you create it. The default name for an archive is Photo Backup<number>, such as PhotoBackup0, PhotoBackup1, and so forth. To change the name, you can click File > Save Archive As.
![]() Related Topics
Related Topics
Working with multiple archives